Sharing Center > Colors

Colors

Other Download Formats

Include Cards from:

PowerPoint Fixed (Plain)

Each page of your material is set as a background image on a PowerPoint slide. This allows you to draw on the page as well as move objects onto the page. Great for Telepractice!

PowerPoint Fixed (w/Tokens)

Same as above, but with some of our most common token symbols. Keep the ones you want and delete the rest to make an interactive game for remote play.

PowerPoint Moveable

Each page of your material is placed on a separate slide as a moveable picture. Rearrange and resize as you see fit.

Note: All PowerPoint formats are tested with Google Slides

22 Pictures Used plus buttonLoad All

Load these pictures into your tray to recreate and customize this material.

Janaina Ochoa
public
Colors & Shapes
Picture Cards
Early Childhood, Primary, Intermediate, Secondary, Adult

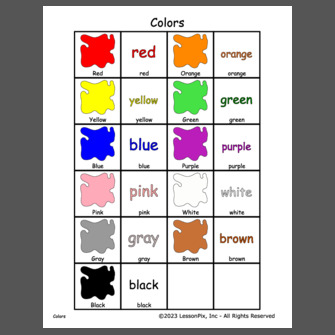
colors red orange yellow green blue purple pink white gray brown black

-Create materials 

-Picture Cards 

-Create Grid of 4 collumns and 6 rows. 


Step 1: PRINT two pages of this document

Step 2: CUT  using one of the printed pages, Individually cut out each picture box , they will be used like a sticker. 

Step 3: LAMINATE  the individual picture cards you cut out in the previous step. These will be used as the "sticker" or "Picture Identification Card."

*** Leave sufficient space for cutting *** (1/4"  between each cut picture card will ensure a proper seal post lamination and cutting  for continuous use.

*** Insufficient space during lamination results in insufficient space for cutting, this comprimises the durability  of each card  Insufficient space can contribute to premature splitting of the lamination sheet and the printed paper which may happen due to continuous use. 

Step 4: LAMINATE the remaining printed page, this will be the template or background the individual picture cards will be matched to. 

Step 5: CUT out only the cards 

Step 6:  VELCRO (Clear velcro dots will be optimal for matching purposes.  I would recommend putting hard velcro on the "template" or the "background" and putting the soft velcro on the individual picture cards. 

 

Share This Material


Embed this Material in your Blog or Website

Embed a large thumbnail, title, and full description on your blog or other website.

Width: 350px Height: varies

Copy and paste the text below:

<div style='margin:0 auto;font-family:Arial,sans-serif;background-color: #eeeeee; border-radius: 10px; padding: 5px; width: 350px;'><a href='https://lessonpix.com/materials/27157316/black' style='display: block;'><img style='display:block;margin:0 auto; border:none' width='335' height='335' alt='Colors' src='https://lessonpix.com/actionshots/cover/27157316/335/black.jpg'></img><div style='font-size: 20px; text-align: center;'><a href='https://lessonpix.com/materials/27157316/black' style='display: block;'>Colors</a></div><div style='font-size: 12px;'><p>-Create materials </p> <p>-Picture Cards </p> <p>-Create Grid of 4 collumns and 6 rows. </p> <p> </p> <p>Step 1: PRINT two pages of this document</p> <p>Step 2: CUT  using <strong>one</strong> of the printed pages, Individually cut out each picture box , they will be used like a sticker. </p> <p>Step 3: LAMINATE  the individual picture cards you cut out in the previous step. These will be used as the "sticker" or "Picture Identification Card."</p> <p><strong>*** Leave sufficient space for cutting ***</strong> (1/4"  between each cut picture card will ensure a proper seal post lamination and cutting  for continuous use.</p> <p><strong>*** </strong>Insufficient space during lamination results in insufficient space for cutting, this comprimises the durability  of each card  Insufficient space can contribute to premature splitting of the lamination sheet and the printed paper which may happen due to continuous use. </p> <p>Step 4: LAMINATE the remaining printed page, this will be the template or background the individual picture cards will be matched to. </p> <p>Step 5: CUT out only the cards </p> <p>Step 6:  VELCRO (Clear velcro dots will be optimal for matching purposes.  I would recommend putting hard velcro on the "template" or the "background" and putting the soft velcro on the individual picture cards. </p> <p> </p></div><div style='font-size: 10px; text-align: right;'><a href='https://lessonpix.com/users/janaina0'>By janaina0 at LessonPix.com</a></div></div></div>

Embed a medium thumbnail with only a title on your blog or other website.

Width: 200px Height: 216px

Copy and paste the text below:

<div style='margin:0 auto;font-family:Arial,sans-serif;background-color: #eeeeee; border-radius: 8px; padding: 2px; width: 200px;'><a href='https://lessonpix.com/materials/27157316/black' style='display: block;'><img style='display:block;margin:0 auto; border:none' alt='Colors' width='180' height='180' src='https://lessonpix.com/actionshots/cover/27157316/335/black.jpg'></img><div style='font-size: 20px; text-align: center;'><a href='https://lessonpix.com/materials/27157316/black' style='display: block;'>Colors</a></div><div style='font-size: 8px; text-align: right;'><a href='http://lessonpix.com/users/janaina0'>By janaina0 at LessonPix.com</a></div></div>

Embed a small thumbnail with no text on your blog or other website.

Width: 150px Height: 144px

Copy and paste the text below:

<div style='margin:0 auto;font-family:Arial,sans-serif;background-color: #eeeeee; border-radius: 5px; padding: 2px; width: 150px;'><a href='https://lessonpix.com/materials/27157316/black' style='display: block;'><img style='display:block;margin:0 auto; border:none' width='130' height='130' alt='Colors' src='https://lessonpix.com/actionshots/cover/27157316/335/black.jpg'></img><div style='font-size: 10px; text-align: right;'><a href='https://lessonpix.com/users/janaina0'>By janaina0 at LessonPix.com</a></div></div>