10 Simple Tips for PowerPoint with LessonPix
As families turn their homes into classrooms, parents and teachers are seeking resources to expand their teaching methods. LessonPix provides powerful tools to create custom materials and a sharing center with ready-made materials such as visual schedules, learning games, and literacy activities. Each material can be downloaded as pdf to print or e-mailed to families in their class or caseload.
In addition to pdf's, users can now download their custom learning materials in Microsoft PowerPoint and Word. (Learn More Here)
This is a great addition, especially for distance learning or telepractice. And don't worry, these PowerPoint files can also be opened in Google Slides. (Learn How)
Here are some basic tips for using LessonPix in PowerPoint:
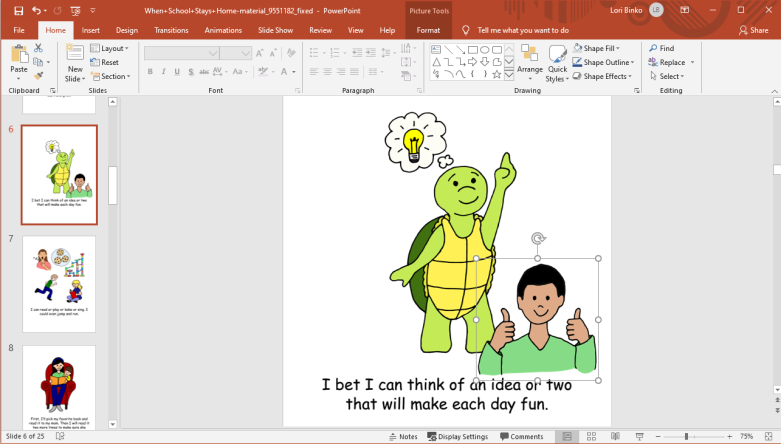
1. PowerPoint as FlashCards
Use template "One Page Pictures" or picture cards (1 per page) for vocabulary or articulation words. When you open in Powerpoint, each picture will appear in a different slide. Teacher and student may scroll through the slides while talking about each picture. Add comments or draw on each slide as you'd like.
Here is an example of simple One Page Pictures telling the story of the "Lion and the Mouse". (Click to find this in the Sharing center.)

2. PowerPoint for Stories
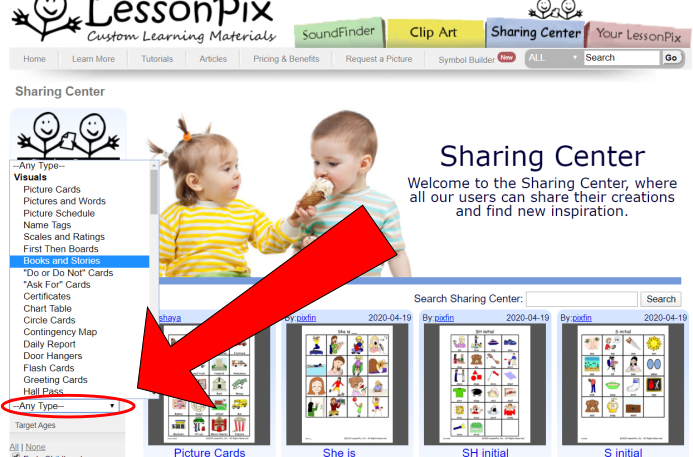
There are many ready-made stories available in the Sharing Center. Filter your search by material type on the left side of the screen to find books and stories templates. As you read each story, you can add notes, symbols or audio (see #9).

3. PowerPoint as a Theme Notebook or Session Journals
Tara Roehl, SLP recommends using Powerpoint as a notebook for telepractice in her interview with LessonPix. Open the file within your teaching session to take notes, practice skills, and play games. The students can review their "notebook" between sessions for practice or homework.
4. Add Symbols as Clip Art
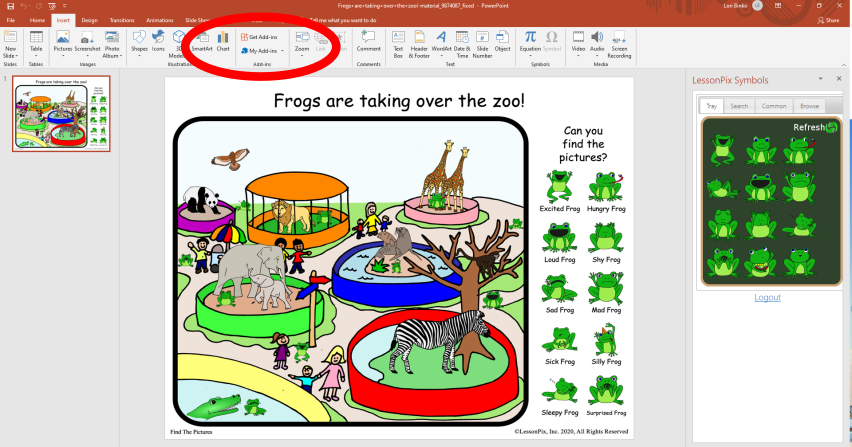
It is very easy to add Lessonpix Symbols as clipart. Lessonpix recently added it's new Microsoft Add-In to Word and PowerPoint. Now you can embed your LessonPix tool right inside of PowerPoint.
Just go to "Insert", and the "Add-Ins" (or "Store" depending on your version), and Search LessonPix. It will add the LessonPix tool on the right side.
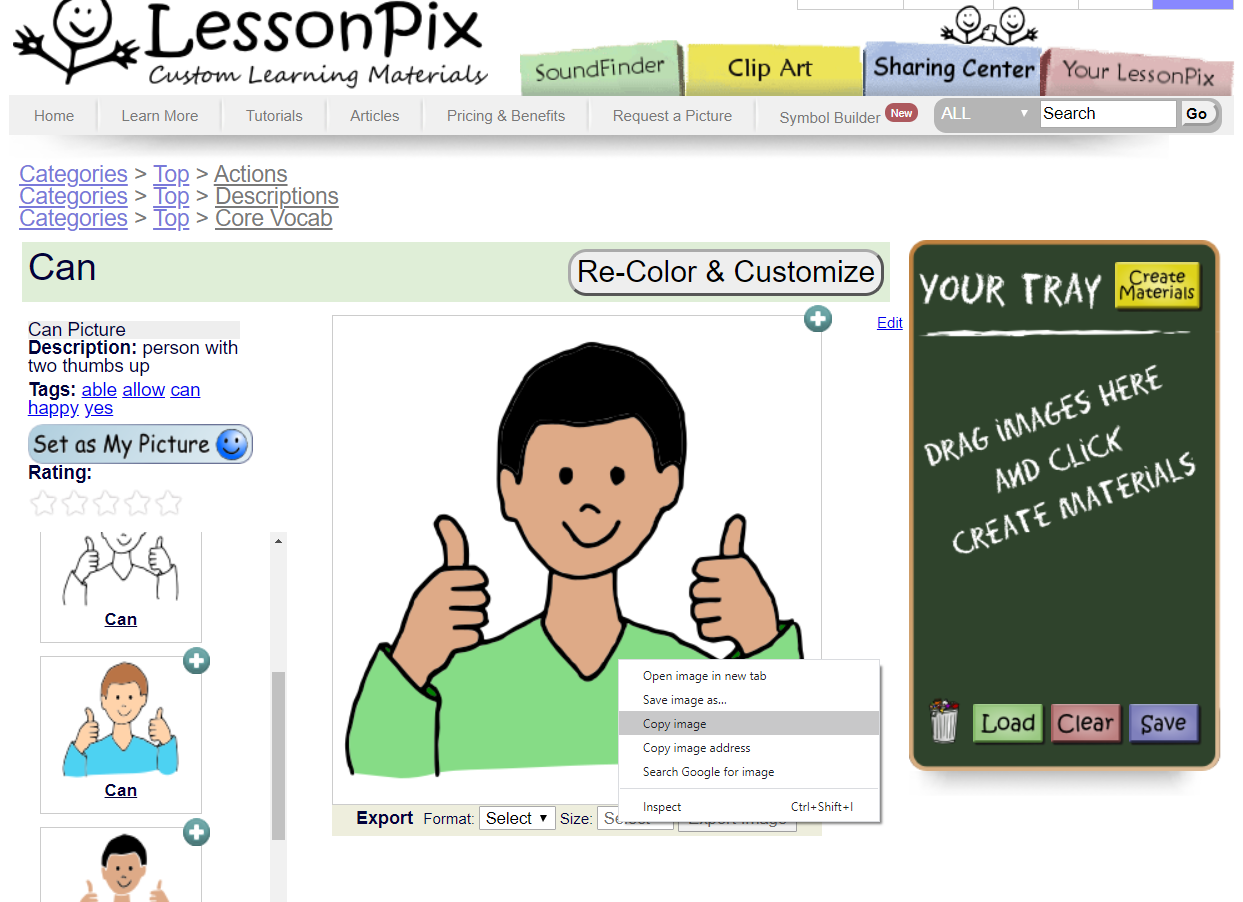
In addition, you can also copy and paste straight from LessonPix. Go to the clip art library and find the picture you need. Click on the image to see the full image page. Right click copy and then paste into your document.
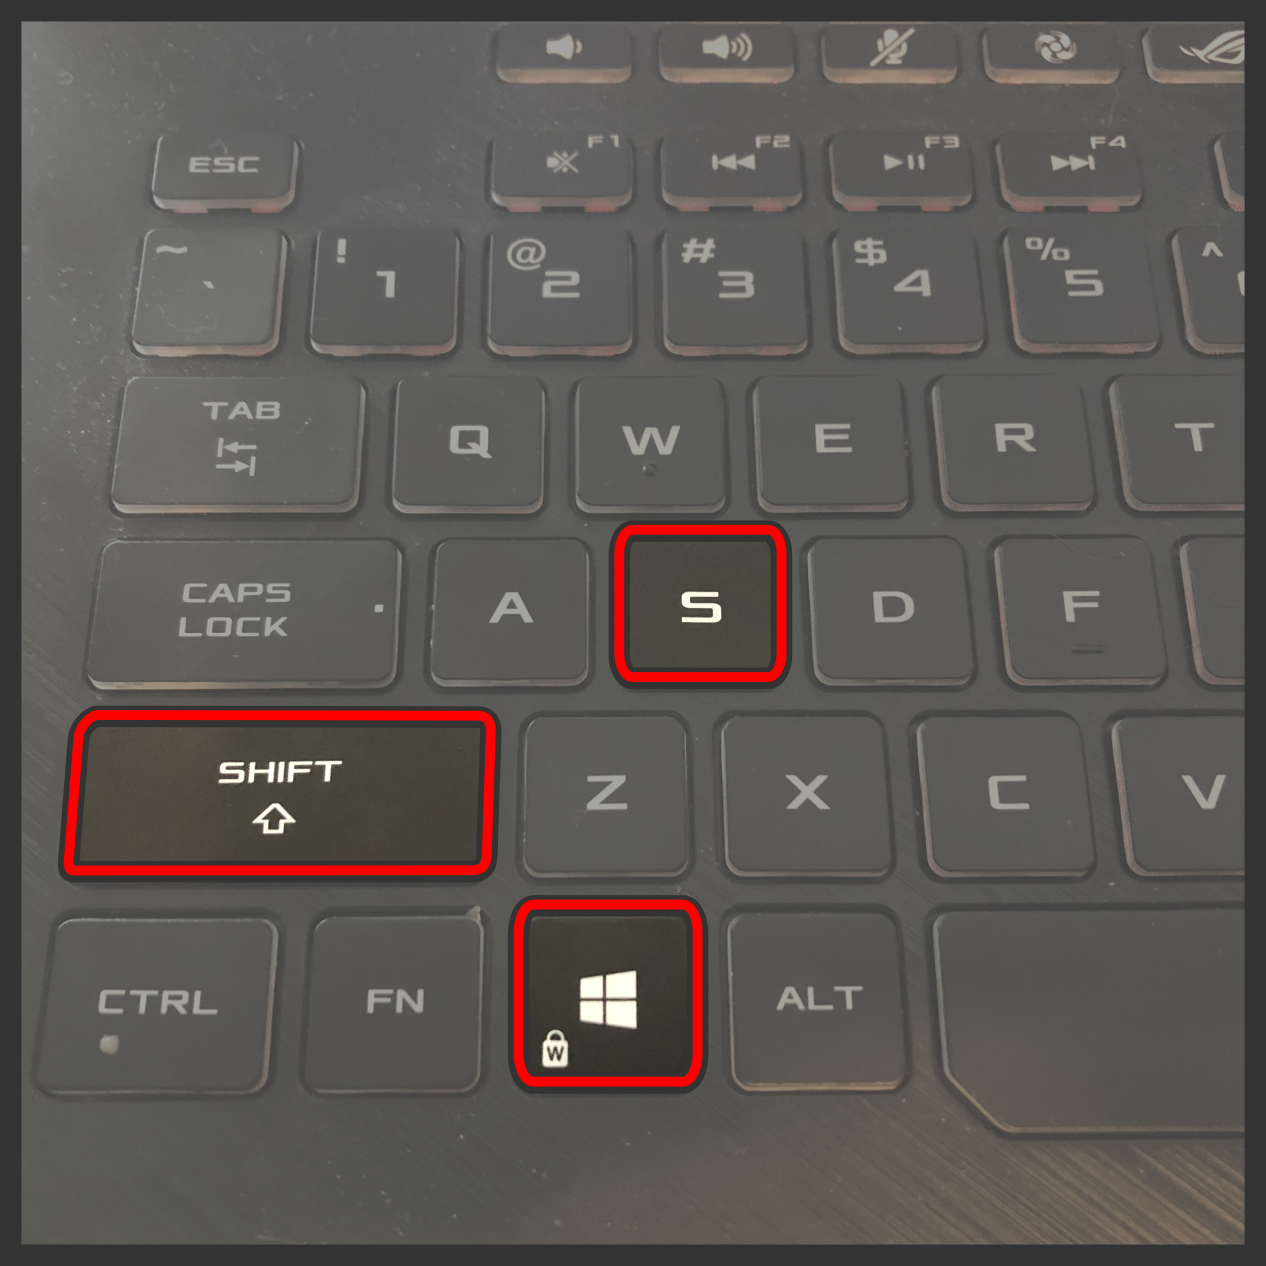
You may also screen shot images using various snipping tools. For example, if you open a LessonPix material in PowerPoint, you can screen shot by pressing "windows key", "shift", and "S" at the same time. (Win+Shift+S). Draw a box over the image you need, and then right click and paste the image on your page.
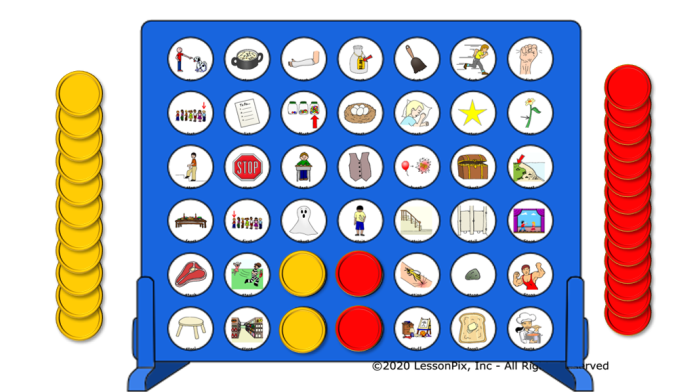
5. Grouping objects for games
Grouping objects allows the objects to move together. You can group a word and a symbol together or a word on a circle to make a token. Then, move the group to play games such as tic tac toe or matching.
In this example, we grouped our practice words ("hi" and "tie") with the token to play a 4 connect game (Inspired by Tali Kellerstein). (Here is a blank .ppt connect 4 game)

Here is how to make the symbols on the 4-in-a-row connect game:
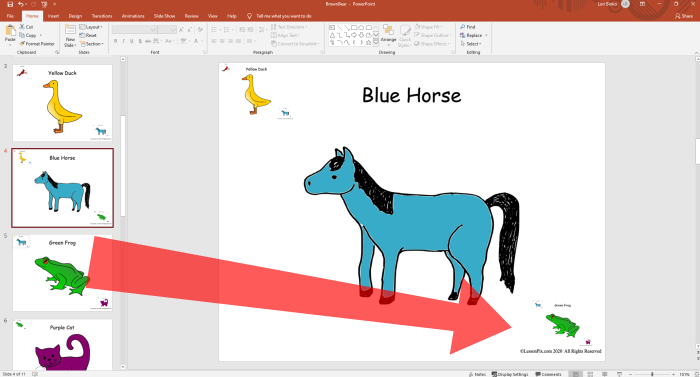
6. Layers to Reveal
Layers are the order that things are placed on a page. When you insert an object, it is placed on a new layer above previous objects. Move objects forward and back in the "Home" tab under "arrange" and also in the "Format" tab under "bring forward" and "send backward".

Here is an example made by Tali Kellerstein, SLP for farm animals. She uses a snipping tool or Win+Shift+S to clip pictures of the farm animals and barn. Using layers, she can hide and reveal animals in the barn. (For a copy of her material, click the picture)

Using the "send to back" along with the group / ungroup features provides interesting ways to hide and reveal information. Here is a video showing adding clipart and using layers to reveal bugs in a garden created by Theresa Ruth, SLP.
Here is an example using layers to reveal text.
7. Slide Shows / Presentation Mode
If you use Zoom or other video conferencing tools for distance learning / telepractice, it may help to NOT use the slide show ability so you can continue to see each other and maintain engagment. However, when you do use this mode, there are some fun animations, audio, and linking to make your lesson more interesting.
Link to other pages by dragging a page from the side panel to the current page. It will show as an object you can shrink or add a frame, etc. When in Slide Show mode, click the link and the page will transition from the current to the linked page. Fun for Books and Stories!
8. Animation
Animation adds fun effects to your presentation, but can only be seen in slide show / presentation mode. By default, when you click an animated item, it will transition to the next page in the file. This is fun for working through flashcards or photos.
When choosing an animation, keep in mind that green icons make the symbol enter, yellow icons start and end in its spot, and red leaves the page.
One idea is to have tokens "fly out" or "bounce" to reveal hidden pictures, words, or information. To make the objects animate without leaving the page, you will need to set the trigger.

If you want to animate multiple tokens, animate one and set the trigger, and then duplicate the token (Ctrl+D). This will have each token animate when clicked. Here is a video using Bingo Dauber Template.
9. Adding Audio
Adding audio to your presentation is easy to do. To add a sound to a page, go to "insert" and then "audio". From there you can choose to have the audio play when clicked or play autimatically when you enter the page. In this video, we add audio to narrate our Books and Stories template, Social Distancing with Pete and Patty.
Add sound files on top of images in your PowerPoint file. Sound files only play in slide show / presentation mode. To add sound on images, we will
- Add a shape (any shape will work) that defines the area where to press and hear the name. (Insert > Shape)
- Make the Shape transparent or no color (Format > Shape Fill)
- Copy that shape to the clipboard (Right Click > Copy)
- Record Audio (Insert > Audio > Record Audio)
- Replace the audio picture with your shape on clipboard (Format > Change picture > From Clipboard)
- Move and Resize new shape on top of symbol
In this video, we add animal names to each picture on a bingo card.
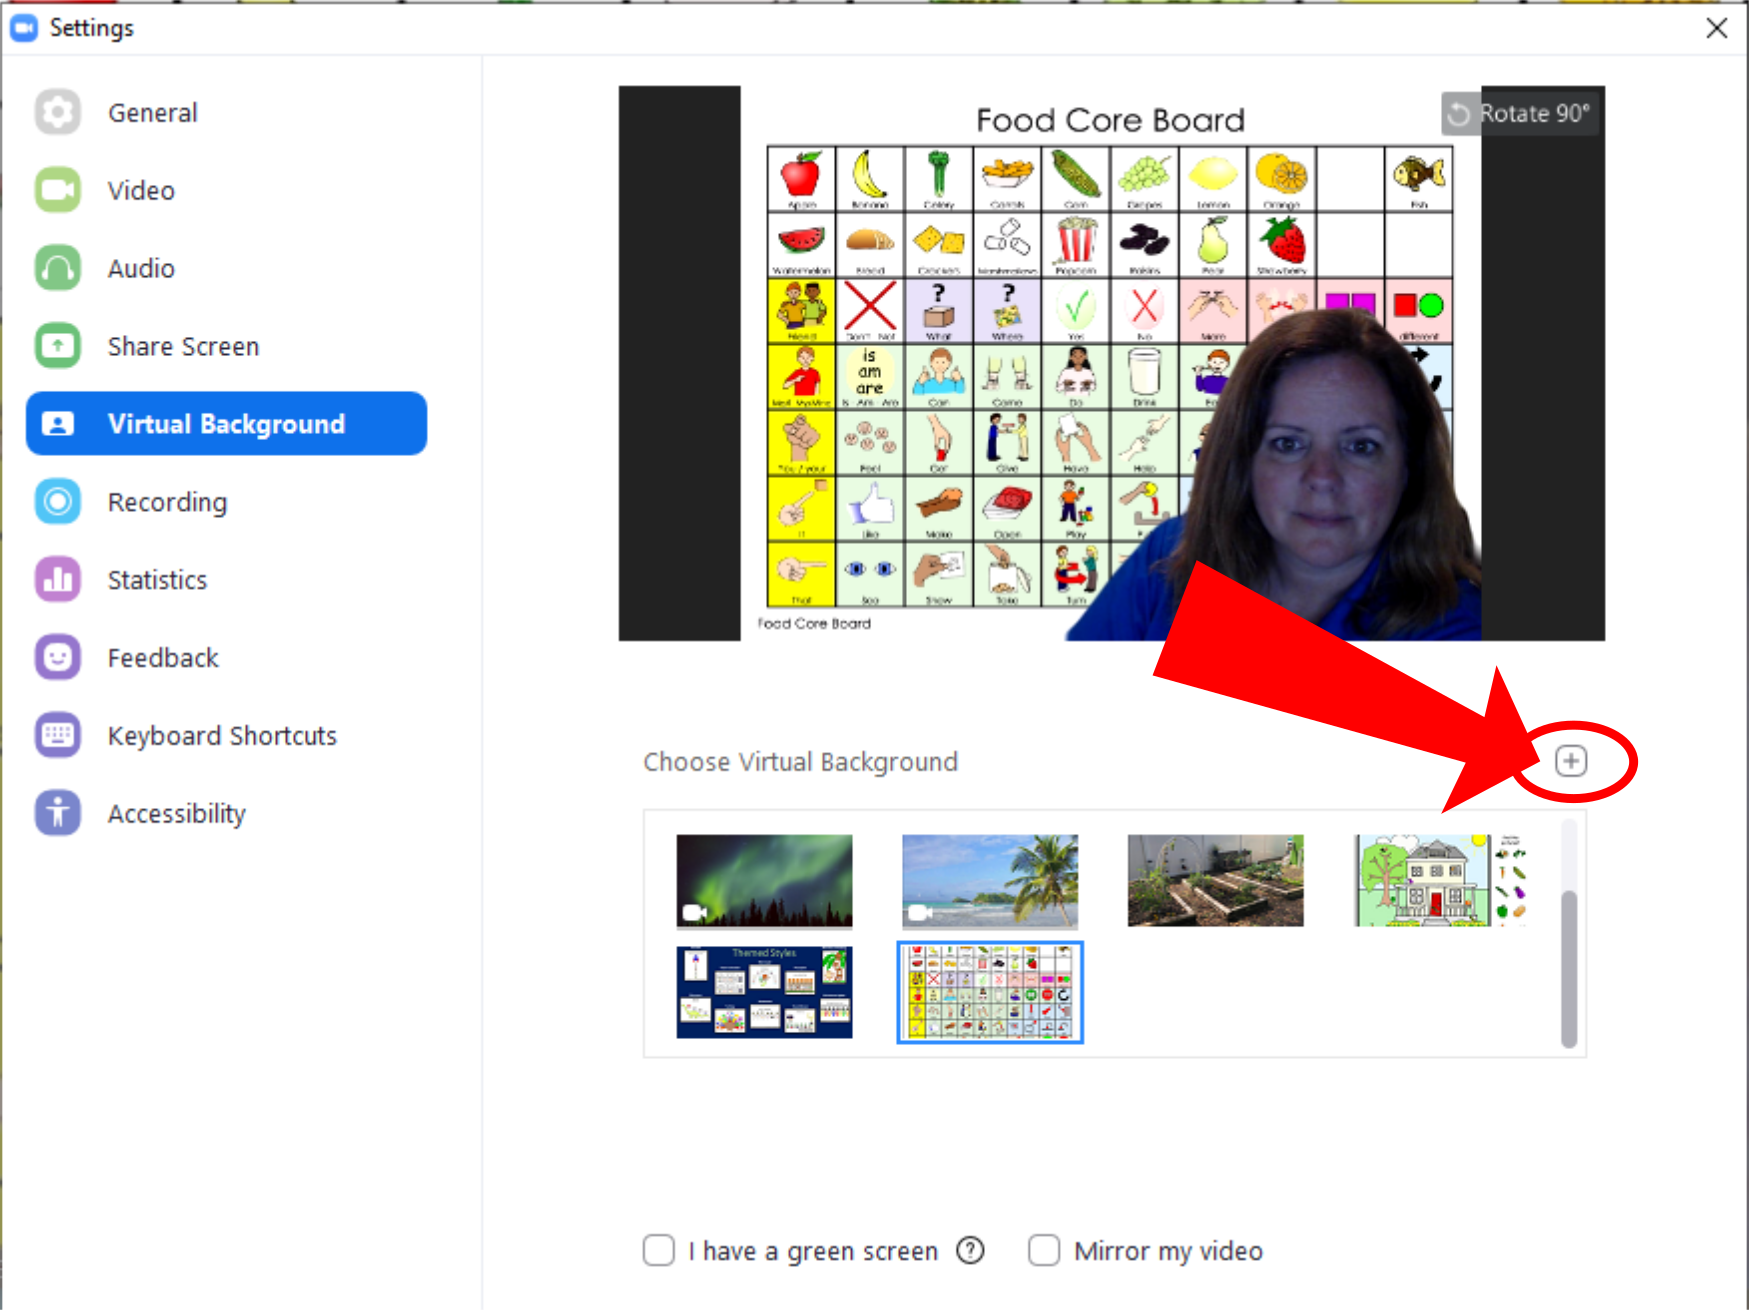
10. Export PowerPoint Pages as PNG (& Use as Zoom Virtual Background)
Once you have your LessonPix material in PowerPoint, you can export each page as a PNG or JPEG file easily. As a PNG, you can use it as your background in Video Conferencing or in other applications.
Here is a video where we make "I Have Who Has" cards for a small group to use in a video conference. I made the game in LessonPix and opened in Powerpoint. Then I could screen capture each card by pressing the Windows key, shift, and S at the same time (Win + Shift + S). Then I pasted each card in a separate page and saved as a PNG.
Here is a video showing LessonPix to PowerPoint Export and then to Zoom Video Conferencing as a Virtual Background.
Here's how to export a PowerPoint file to a PNG:
- In PowerPoint, Go to "File"
- "Save As" or "Export"
- "Change File Type"
- Select "PNG"
- Save it where you'll find it!
To insert in Zoom, click the arrow next to "Stop Video " and select "Virtual Background". Choose the plus to add your background. When using Zoom backgrounds, try to keep your backgrounds simple, relevant to the lesson, and not too distracting.

Hope this information helps. If you have more suggestions, e-mail support @lessonpix.com. We'd love to hear from you!
*** Bonus: Opening PowerPoint Files in Google Slides ***
Yes, you can open Powerpoint files in Google Slides. Here's how:
 Facebook
 Twitter
 Pinterest